 |
- Deck - | |
After a few years of my wife insisting on a deck on which to sit outdoors, I finally relented.
I was informed that I agreed with the fact that we needed a place to sit outside to enjoy the summer days and the warm evenings.
As Christmas was approaching, it seemed like the right time.
 |
I must admit that I have also been looking forward to being able to enjoy a sun downer on a red summers evening.
So it began - the debate between building it myself or hiring a contractor.
For many reasons I eventually decided
to build it myself.
I am happy that I went that way as I do enjoy the fact that I built it myself.
So I took a look at a few basic deck building tutorials on YouTube.
For more specific details I consulted with my brother in Knysna who has a lifetime of carpentry experience behind him.
Please join me for a quick pictorial of the build, along with a few helpful hints for any poor soul considering doing the same.
Thanks first to Warren Purdon for telephonic tech support, Keith Purdon for assisting with parts of the build and to my wife Heather for assisting with fastening and painting.
|
- The Build- | |
Let me start by saying that you need 3 power tools to get this job done.
A cordless drill/screwdriver, a skill saw and a jig saw.
If you don't have these then I suggest you find them.
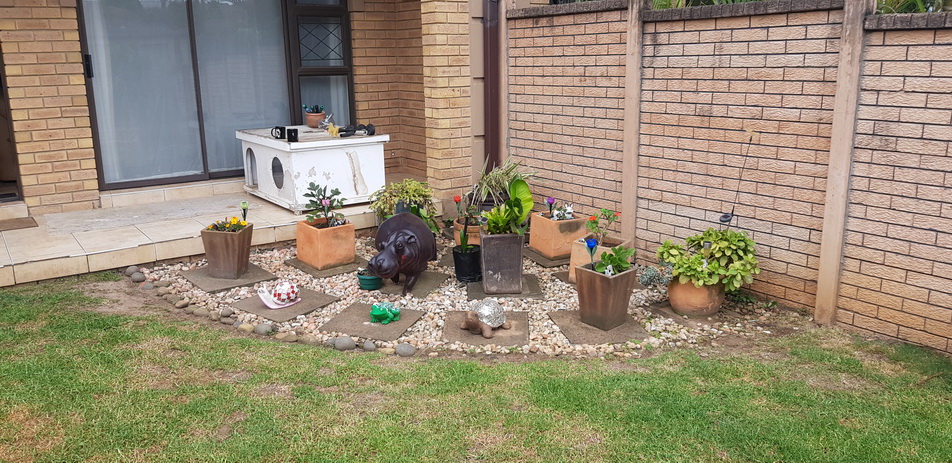
The first order of business was removing the existing floral installation created by my wife a few years back.
All of this had to be moved away as it stood in the way of the build.
 |
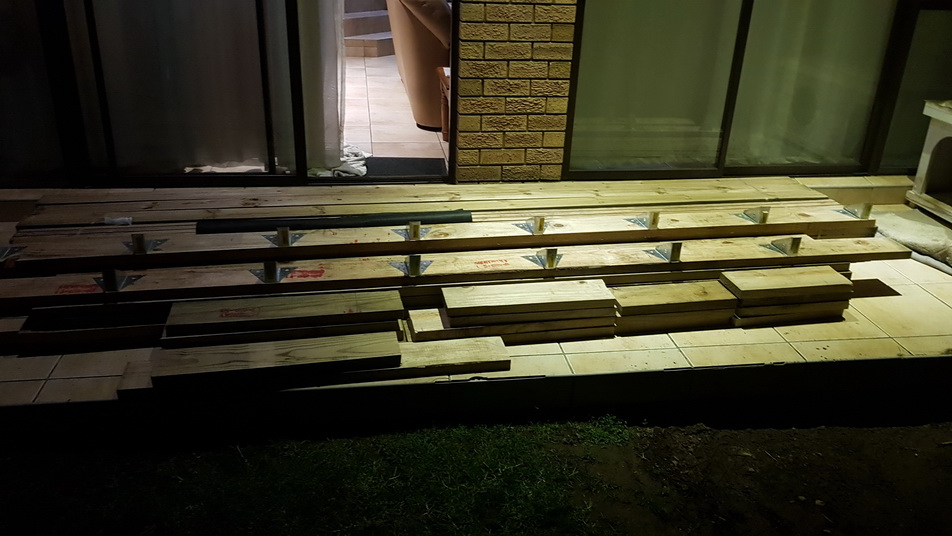
In order to spend as little time as possible in the heat of the summer sun, I pre-cut all the wood for the base structure in my garage.
I also fitted the roofing brackets to the two end beams.
This timber is treated Pine - 38mm X 154mm X 3.6m.
Everything was packed out in preparation for the next days work - much to the annoyance of my dog who found this terribly inconvenient.
 |
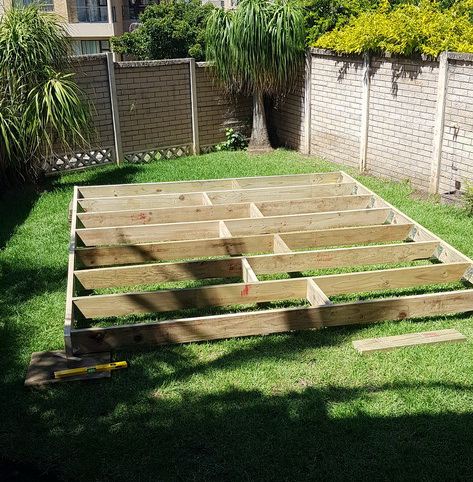
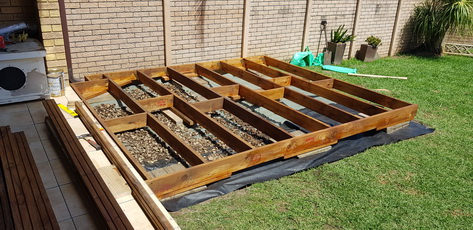
Next was the frame assembly.
I placed concrete slabs under the four corners and screwed the entire frame together.
Two things to remember at this point:
Make sure the frame is level.
Make sure everything is square.
 |
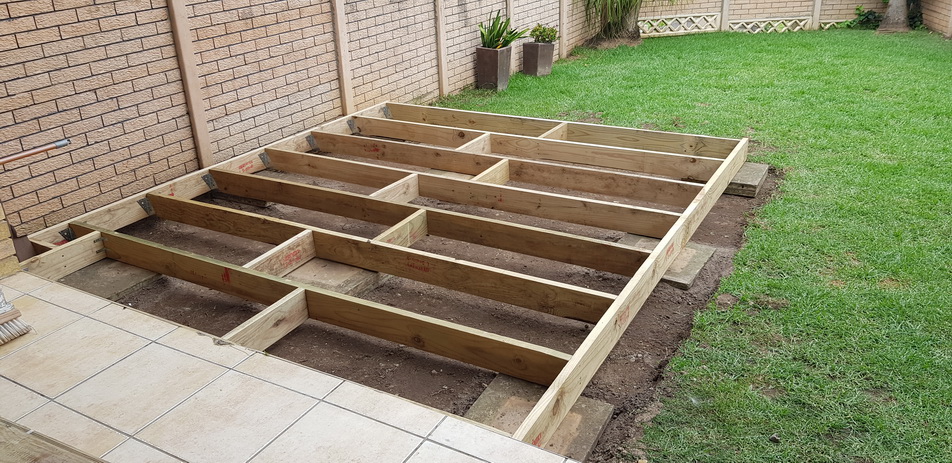
Then for the worst part of the job.
Preparing the ground.
I had 8 supports on which the deck has to stand.
Getting every support at exactly the right height was painful.
Each support must be right or it will not make contact with the deck.
This will result in a deck that is not rigid and possibly rocky.
The frame was then placed onto the supports - Third time lucky.
 |
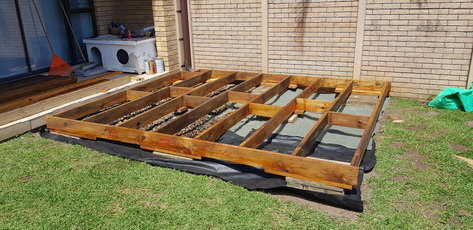
The frame was flipped over for painting.
Although the timber is already treated, a coat of Wooddock Deck Sealer will extend its life.
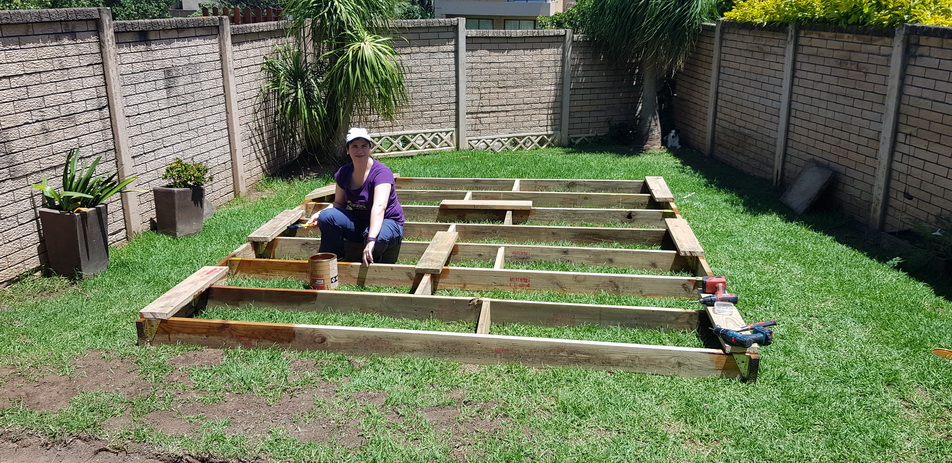 |
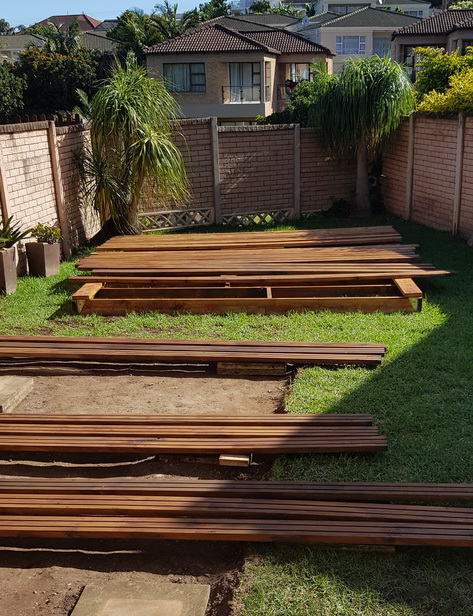
The painted frame is returned to the supports and will not be moved again.
The ground sheet has also been laid under the supports.
This allows for drainage while preventing plant growth under the deck.
 |
 |
The decking planks are painted with sealer on the bottom and sides.
These will not be accessible once the boards are fastened to the frame.
These are treated Pine - 38mm X 114mm X 3.6m.
 |
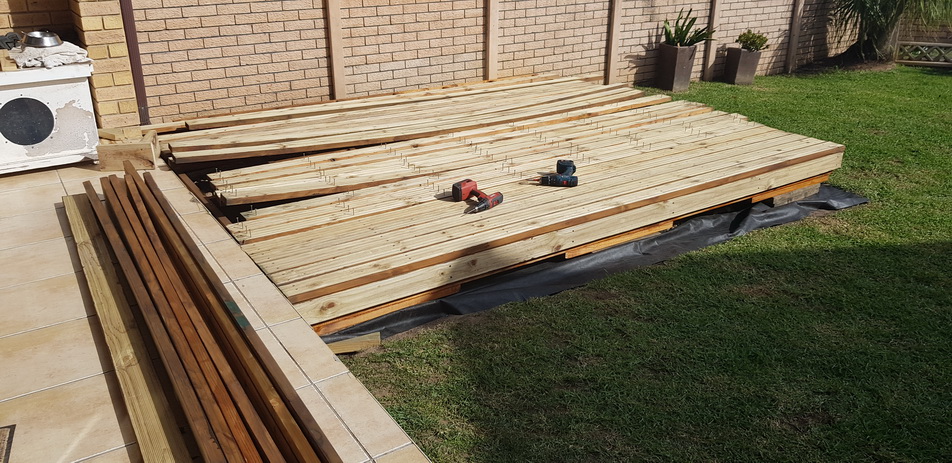
The process of screwing the decking planks to the frame begins.
I used 60mm stainless steel decking screws with a spline head.
The stainless steel will last forever and the spline head prevents the drill from slipping as you turn the screw in.
This little deck required 800 screws for the decking planks alone.
Some good advice:
Drill holes threw the decking planks so that the screws don't bite into them.
Turn the screws in slowly as stainless steel screws get hot and snap off.
Use two drills so that you don't have to change between drill bit and screw tip all the time.
Watch how far you turn the screws in. Pine is not uniformly dense and the screws will pull in too deep if you let them.
 |
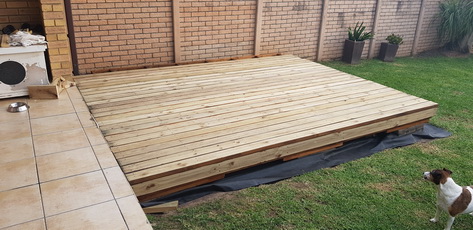
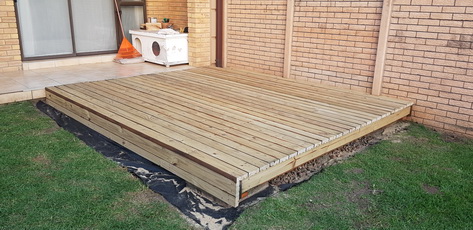
All of the decking planks are now screwed down.
Notice the planks attached to the sides of the frame to make the fascia a little prettier.
 |
 |
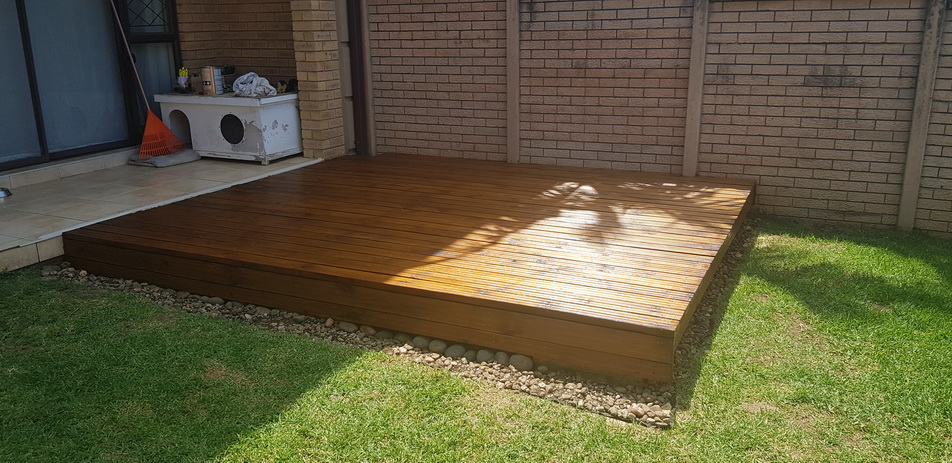
The surface is now painted and the structure is complete.
It is firm and level.
I am pleased and relieved.
 |
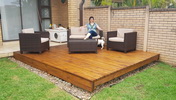
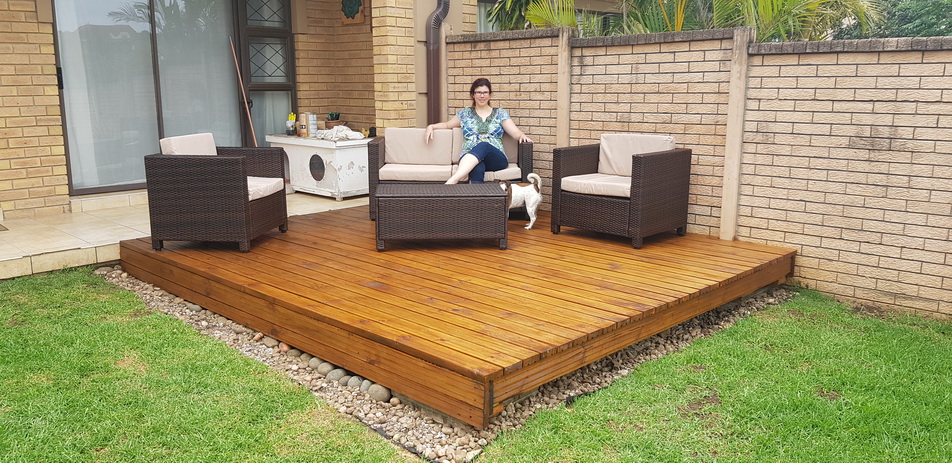
We placed the new patio furniture on the deck to check the sizing.
The furniture was bought online from Takealot during a black Friday special.
Good timing.
 |
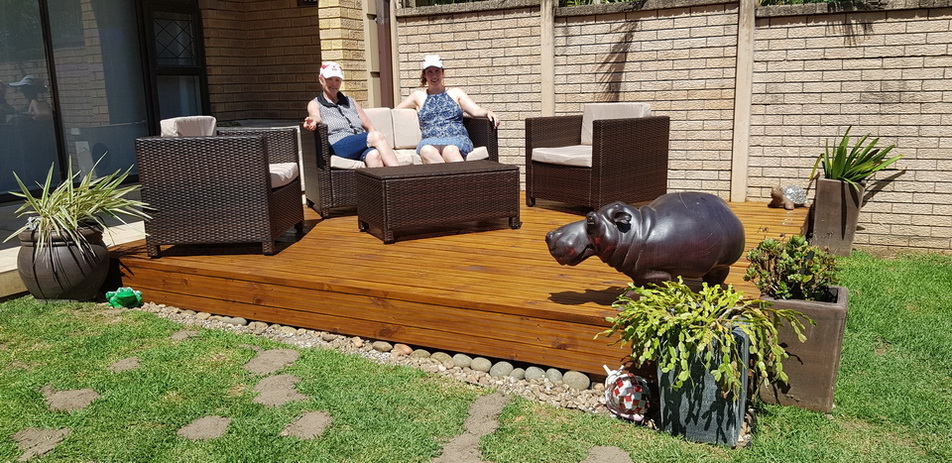
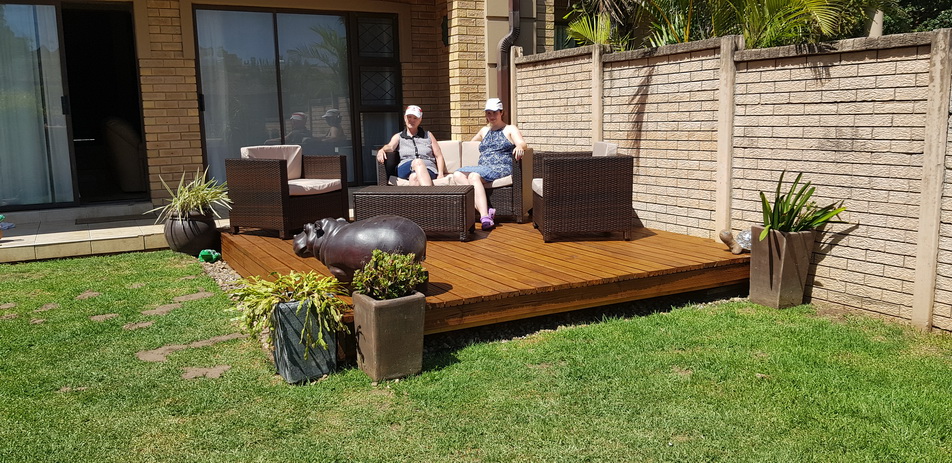
Finally my wife and her mother placed the plants and animals around the deck, thus finishing it off beautifully. Job done.
 |
|
I am very pleased with my first attempt at building a deck.
It made a lovely setting for Christmas dinner.
I am happy that at the end of the day, I built it with my own hands.
I look forward to many summer sun downers in the coolness of late summer evenings.
Thank you for viewing my build.
Please come back soon to see what I attempt next.